Metal Guard

Roof Inspections

Metal roof inspection and analysis

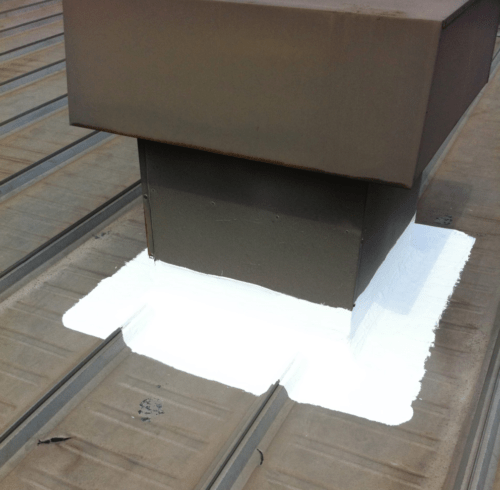
Metal Roof Leak Repair – See waterproofing and coating

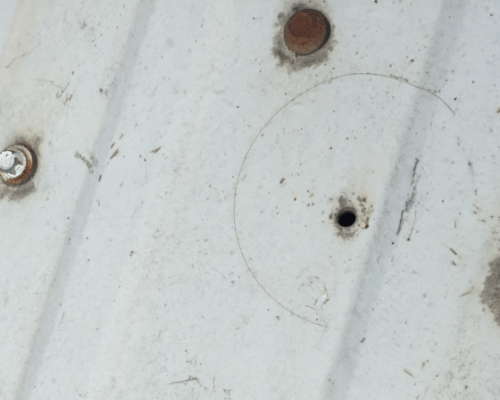
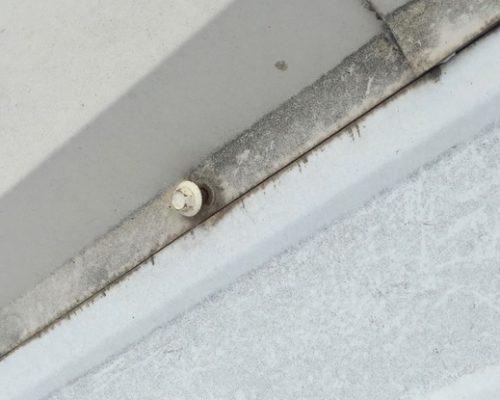
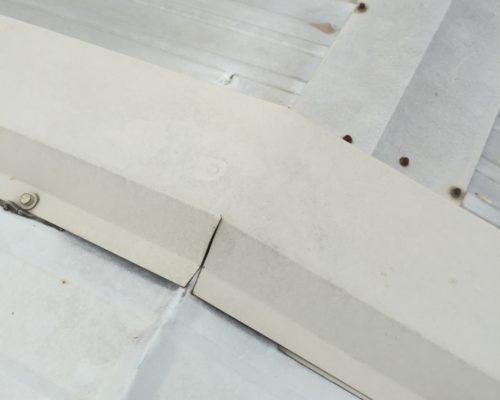
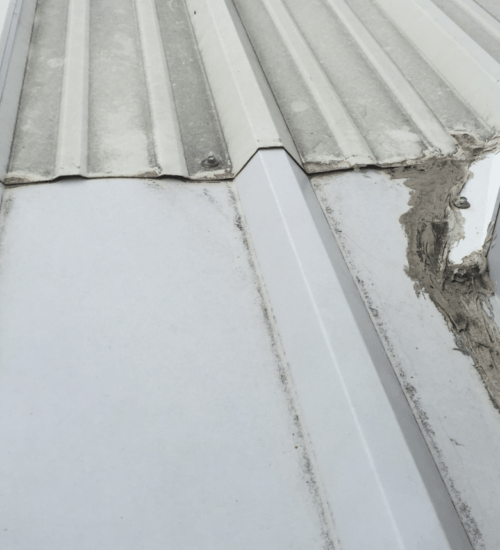
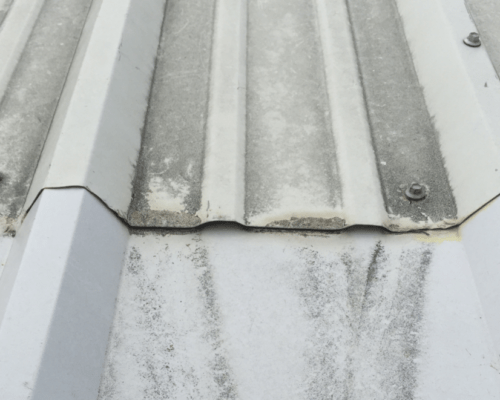
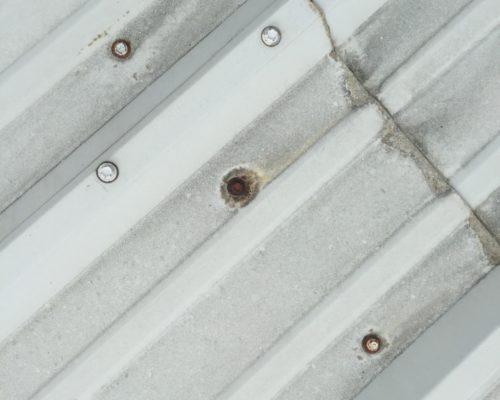
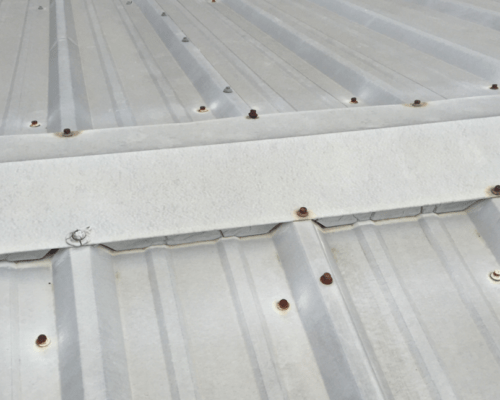
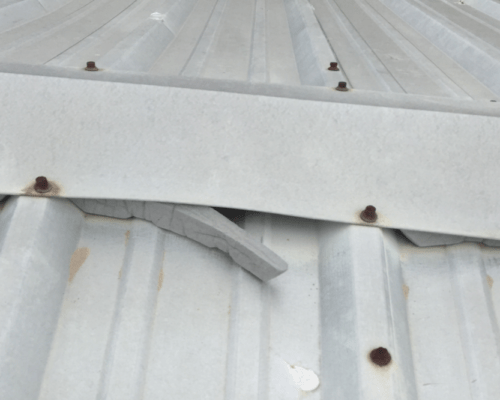
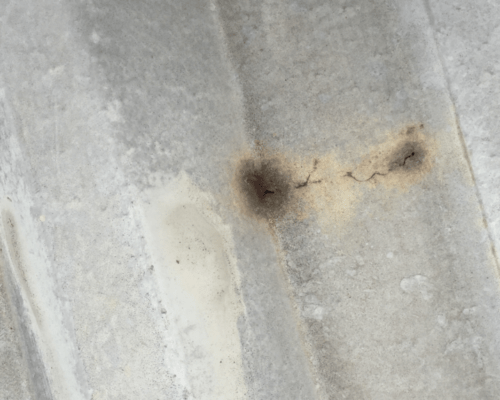
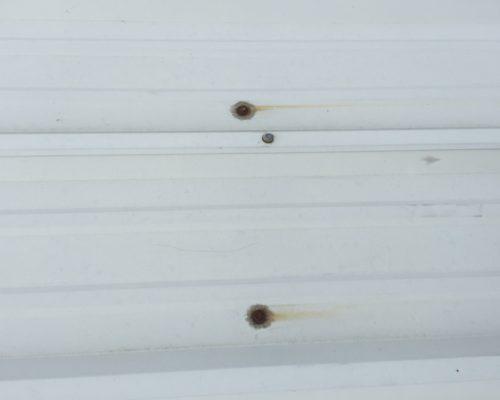
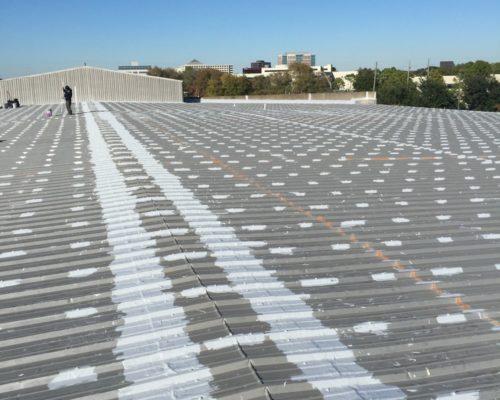
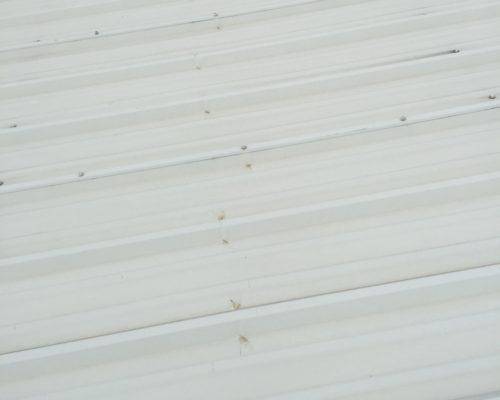
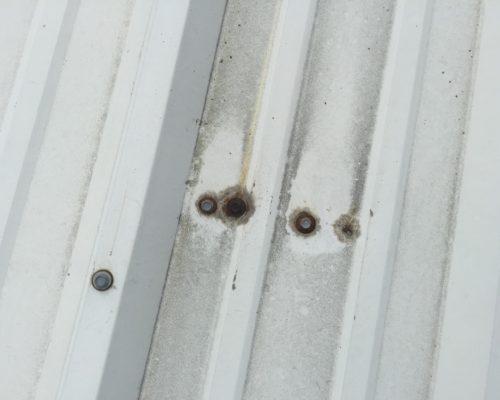
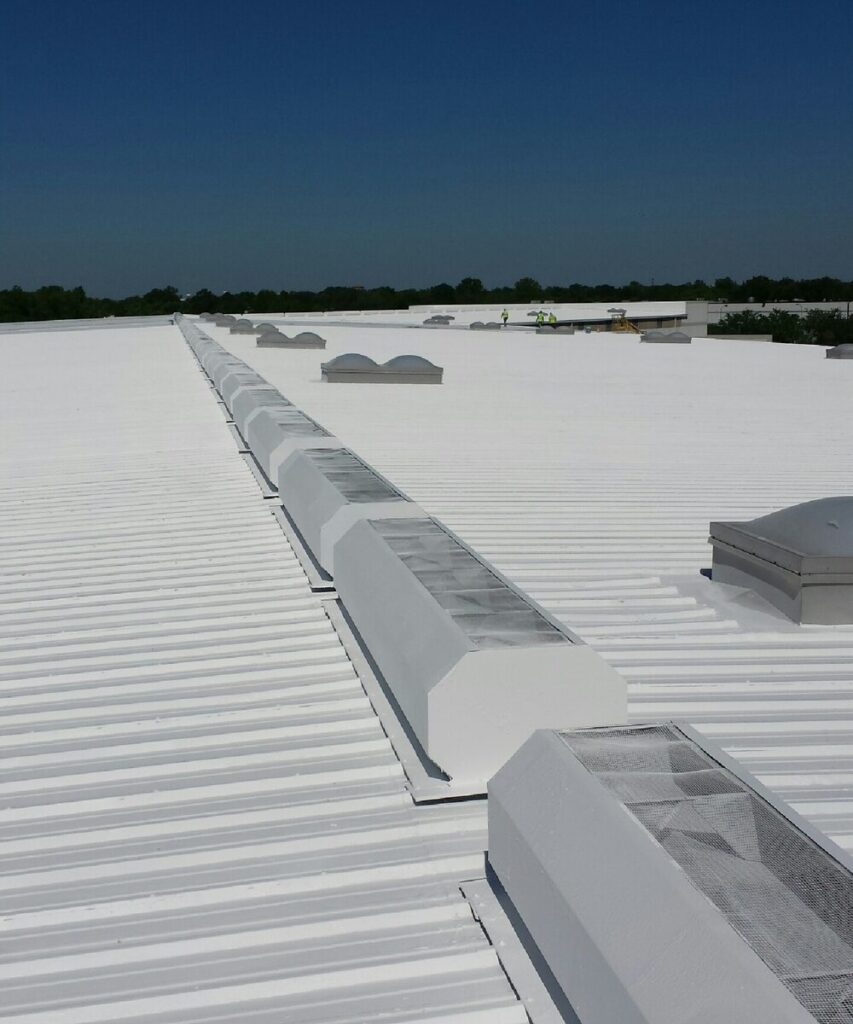
The roof is a metal roof (polar white). The panel profile is a PBR profile. The ridge cap above the office is a pre-formed ridge cap; the cap is the same profile as the panel. The warehouse has a flat ridge cap, i.e., it sits on top of the roof panels. The roof is generally in good shape, the effects of the Texas sun and heat have made some maintenance necessary. The focus of this review is to identify leaks and offer solutions on how to stop them. In addition to the leaks some of the insulation has also been affected by the leaks. Some of the insulation problems will be corrected by our recommendations. If you would like, we would be happy to provide recommendations for all of the interior insulation needs.

Below you will find photos of a typical roof along with a short explanation of why they were important.  In addition, the problem and solution will be presented. The building owner called about metal roof leak repair services

Based on an on site inspection, the roof can be repaired and sealed.  At completion, a 5 year, non-prorated, labor and material warranty will be provided. It will include an annual inspection, any potential problem areas will be addressed during the annual inspection or shortly thereafter.

Office Roof

The photos below are of the office roof.

Addressing Missing and Damaged Fasteners

Above, one of the missing fasteners on the roof.  When a metal roof is being installed it is not uncommon to have this occur.  It happens when the fastener doesn’t go into the purlin below the roof panel, they just hit air and there is no bite.  They are typically marked for a different kind of fastener or caulk.  Sometimes the marks aren’t found during the review.   We would add a fastener wherever we found one to be missing.  Rusted, damaged and backed out fasteners would be replaced, about 10% of all fasteners on your roof.  Water is entering the building thru the hole above.

Managing Backed Out Fasteners

Above, a backed out fastener. This is an example of a backed out fastener. Due to the changes in the roof temperature the roof is expanding during the heat of the day and contracting when the air cools.  This can cause fasteners to back-out. This is one of the backed out fasteners on the office roof.  We have seen the insulation hold 10 or 20 gallons before it breaks or splits at the seam. Water is entering the building here.

Sealing and Strengthening Rake Trim Transitions

Above. This is a picture of rake trim at the office/warehouse transition. Rake is a piece of transition trim that keeps water out of the gap between the edge of the roof and the wall panels. In this case it is used as a trim piece between the two roofs. Water is probably entering here at these seams and the cut. There are three areas on the roof where this trim was installed like this. This needs to be scrimmed and sealed.

Critical Roof Repairs

Enhancing Waterproofing and Sealing for Various Roof Components

Above, more fasteners from the upper roof

Above. This is one of four fan vent covers near the peak of the office roof, they need to be sealed and scrimmed.

Above, another unit at the top of the office.  It needs to be scrimmed and sealed.

Above. this is a piece of rake trim at the front of the building.

Above. A photo from the peak of the roof to the eave. The vent at the eave are visible in the top on the photo.

Enhancing Roof Vent Flashing and Waterproofing

The above picture is of the flashing detail on the high side (water would flow from the bottom of the picture to the top) of one of the roof vents. The vents are at the eave of the office roof, there are 7 on each side of the roof. Butyl caulk tape should have been added between the vent seams to prevent leaking. Also, the profiles could have been a closer match. The caulking that has been added is a very temporary fix. When these vents were originally by the vent contractor many leaked. After 4 return visits they appear to have stopped leaking. They will leak again if not treated. There is a lot of dirt on the roof, the first step in our waterproofing process is to pressure wash the roof.

Another picture of vent flashing detail at the eave of the office roof for another vent. All of the vents look similar to these. You can see the caulk is already failing and cracking.

Mitigating Rust and Ensuring Longevity

This is an example of a roof penetration after we have sealed and scrimed it. A layer of urethane coating is applied, a 6″ strip of polyester reinforced fabric is laid on top of the metal seams, followed by another layer of urethane coating. After this has cured another layer of urethane coating is applied. All of the sealing products that we use are manufactured specifically for metal roofs.

Another, This is on the office roof. The heavily rusted fasteners where rust is leaking out from them onto the roof would be removed and replaced. Rust leaking out means that water is getting to the fastener threads below the roof, which are starting to rust. The rust starts to eat at the hole that the fastener was drilled thru in the panel and the roof purlin. If the fastener is left in and not removed but sealed and coated it won’t leak anymore. However, rust will still be present on the fastener threads. By removing the fastener we are removing a rust contributor which will help prevent premature aging of the roof.

Warehouse roof

The photos below are of the warehouse roof.

Restoring Ridge Cap Integrity

Above. This is the ridge cap in the warehouse section of the building.  Between the ridge cap and the roof panel a foam closure is installed to keep driving rain out. All of the closures in the warehouse section require replacement. They have dried out and are shrinking.

 Another picture of the warehouse section of the ridge cap.  Even where it has stayed in place it is dried out and cracked.  Requires replacement. The foam closures are a standard metal building component.  They will be replaced with caulk sealant applied to the top and bottom to seal the gap. The new closures will fit snuggly in the gap.

Rust Repair and Fastener Restoration

Above, this is over an area where of one of your worst leaks. There is a section of the warehouse roof where it is rotted out. It isn’t visible from the surface of the roof except for some areas where the panel has become so rusted it has broken away from the fasteners, or there are holes. When walking in this area it sounds crunchy, similar to the sound when crushing potato chips. This is because the panel is so rusted on the underside that rusted pieces of metal are scrunching together. Definitely requires replacement in this section, about 12′ by 22′. When changing the metal any damaged insulation below will also be replaced. One of our green initiatives is to restore at much of the roof as possible without replacing it. However when it is necessary we recycle all of the metal.

Another, This is Rusted fasteners and a missed fastener during the original installation. The fasteners will be replaced here, the caulk scraped off and a fastener put in the hole. All fasteners will receive two coats of urethane sealant after the repairs have been completed.

Leaking Fasteners and Rust-Related Panel Erosion

Above. This panel, as well as the others in the area, have started to rust out from the bottom due to moisture getting into the building from leaking fasteners. The fiberglass insulation between the roof panel and the roof purlin holds moisture causing the damage. if left untreated not only will the panel require replacement but the roof purlin also.

Another fastener where the panel has started to push up thru the fastener. Why do fasteners leak? There is a neoprene rubber washer between the metal cap of the fastener and the roof panel. If over tightened the pressure will split the washer. Look at the right side of the fastener, the black area is the washer pushed out from between the fastener and the roof. On the top left is where the washer was split, where the rust is. Water is getting between the roof and fastener and into the building.

Roof Maintenance and Improvements

Addressing Various Areas for Sealing and Enhancement

Above, another section with failing ridge cap closures.

Above. This transition piece between the office and the warehouse needs to be scrimmed and sealed.

Above. Rake trim at the back of the building, a cut in the trim. Needs to be sealed and srimmed.

Above, view from the rear of the roof to the front.

Above, view from the front of the building to the rear.

Photo above. Aluminum roof coating.

Renewing Roof Strength

Above. This is the newer roof section at the back of the warehouse. Some of the fasteners are starting to rust heavily. The rust appears to be rusting from the threads below the thread. They need to be replaced.

Above, view of a sealing project to stop leaks after we have sealed all fasteners using grey as the top coat.  The product comes in grey of white.  This is similar to what your roof would look like after the process has been completed.

It does not include a coating, for comparative purposes please see the pictures below for what a building looks like after it has been sealed and coated.

Rust Induced Creases and Fastener Failures

Above, again, newer section of warehouse. Look closely at those rust lines. Those have developed because at some point the panel was bent and slightly creased or cracked. What happened was the protective coating cracked so water is getting down to the unprotected metal and rusting. We will coat this area with the urethane sealant we use. It has a rust inhibitor.

Above, rear, newer section of building. On the right, if you look close you can see where the head of the fastener has broken off, probably during the original construction. The other fasteners require replacement, and then will be sealed and scrimmed.

Addressing Leaks with Comprehensive Roof Repairs

While an elastomeric roof coating might seem like a quick fix, it’s important to understand that true leak prevention goes beyond surface treatments. Coatings might temporarily seal minor gaps and cracks, but they often fail to address underlying issues that contribute to leaks. Rather than relying solely on a coating, a more thorough approach involves identifying and rectifying the root causes of leakage.

$("input.slider").on("input change", function(event) { var element = $(this).parents("div.container"); var pos = event.target.value; element.find("div.before").css({width: pos + "%"}); element.find("div.slider-button").css({left: "calc(" + pos + "% - 18px)"}); });